


Part 3 - Interface
The "Navigation Tools" section explores the key tools and features available in the ECDIS system for effective navigation management. Here, you will learn how to use various tools to set waypoints, configure virtual ranges and lines, and monitor anchor zones and other critical parameters. These tools will assist you in fine-tuning and optimizing navigation data, ensuring safe and efficient passage.
3.4. Navigation Tools
>
>
3.4. Navigation Tools
Select 'Part 1 - Interface' to start the tutorial. After successfully completing this part, new sections and all subsequent ones will be accessible in this menu.
The currently examined element is indicated by a green outline and numbering. Explanations will be provided in this window. After reviewing the information, click the 'Next' button or follow the instructions. If you wish to go back to the previous step, click 'Back'. If you decide to finish the study prematurely or choose another section, click 'End'.
Message
0


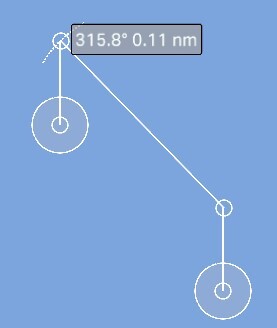
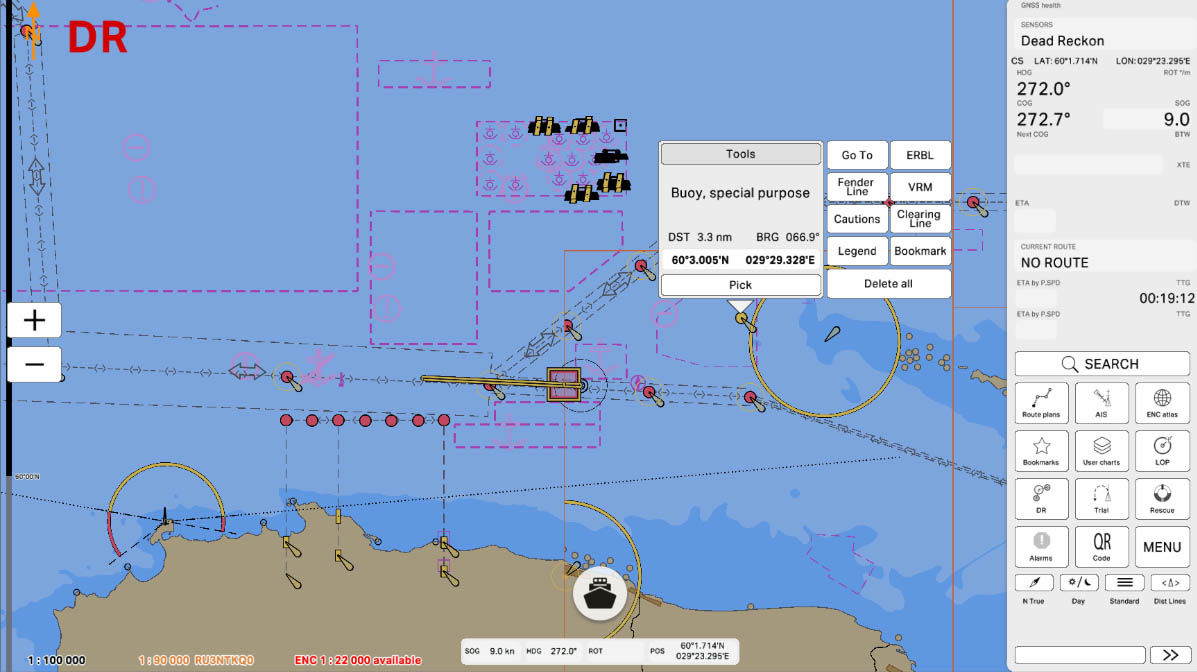
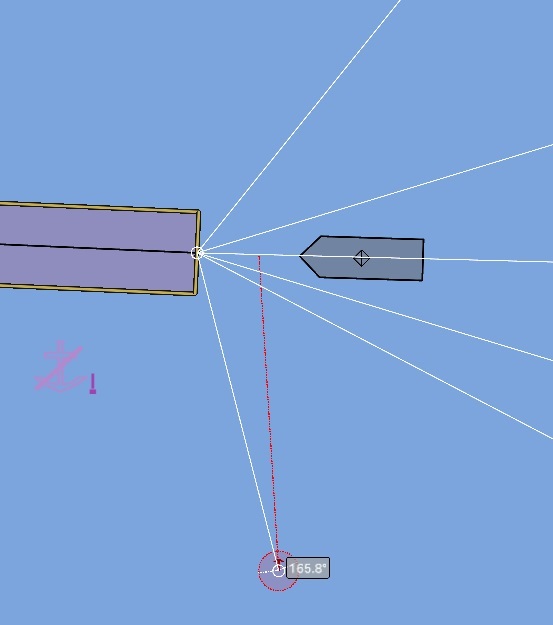
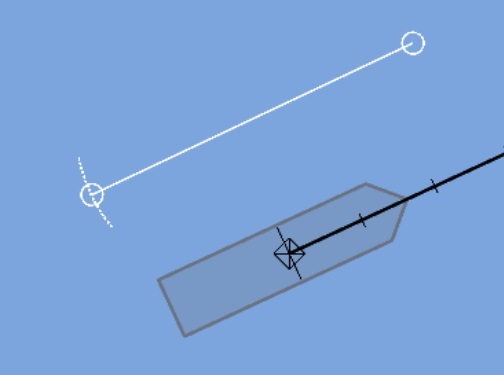
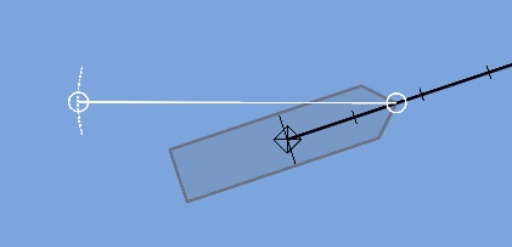
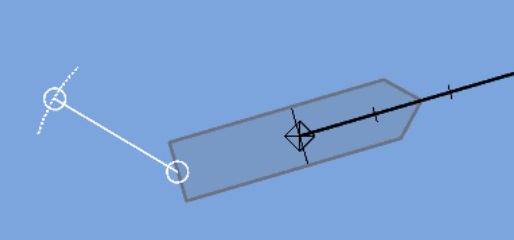
ERBL (Electronic Range and Bearing Line) is a tool used to measure distance and direction on the navigational chart.
- Changing ERBL Distance or Angle: Move the farthest handle to adjust the distance or angle of the ERBL.
- Changing ERBL Starting Point: Move the nearest handle to adjust the starting point of the ERBL or to link it to your ship.
- Activating ERBL: To modify the ERBL, tap on it and press the "Activate" button.
- Configuring ERBL: To configure the ERBL, tap on it and press the "Configure" button.
- Deleting ERBL: To delete the ERBL, tap on it and press the "Delete" button.
ERBL
2

Fender Line is a tool used to set a control line. The distance will be displayed when the vessel is within 500 meters of the line.
- Setting and Adjusting Fender Line: Use the handles to adjust the size and position of the line.
- Activating Fender Line: To modify the line, tap on it and press the "Activate" button.
- Configuring Fender Line: To configure the line, tap on it and press the "Configure" button.
- Deleting Fender Line: To delete the line, tap on it and press the "Delete" button.
Fender Line
3
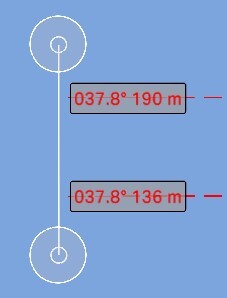
VRM (Variable Range Marker) is a tool used to determine the distance to a specific point or object on the chart.
- Setting and Adjusting VRM: Move the outer handle to adjust the distance or angle of the VRM. Change the position of the inner handle to set the starting point of the VRM or to link it to your vessel.
- Activating VRM: To modify the VRM, tap on it and press the "Activate" button.
- Configuring VRM: To configure the VRM, tap on it and press the "Configure" button.
- Deleting VRM: To delete the VRM, tap on it and press the "Delete" button.
VRM
4

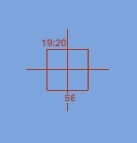
The Watch button allows you to place a marker on the chart with a custom name. The marker will display its name along with the time it was set.
This feature can be useful for:
This feature can be useful for:
- Monitoring specific locations (e.g., areas of interest or potential hazards).
- Tracking navigation events (e.g., position at a certain time, start of a maneuver).
- Marking waypoints for future reference (e.g., a location to revisit or monitor changes over time).
Cautions
6
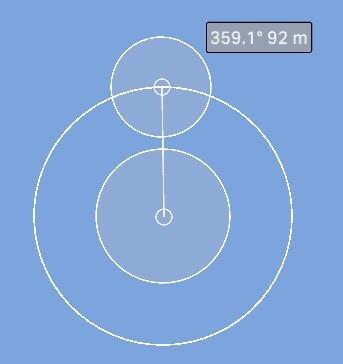
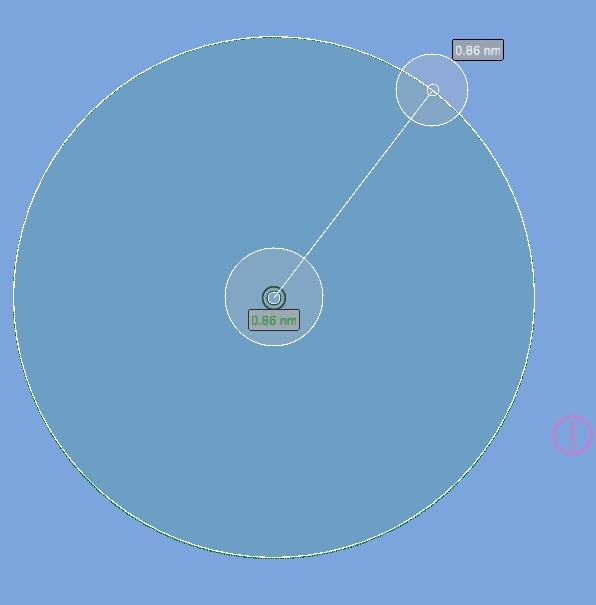
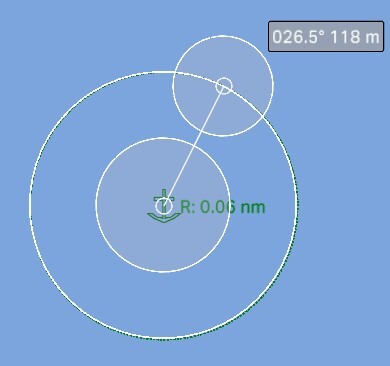
The Time button allows you to set a central point and define a surrounding circle. ECDIS calculates the time required to travel from the circle’s boundary to the center based on the vessel’s speed. This estimated time is displayed at the central point. When the vessel crosses the circle, ECDIS issues a warning.
This feature can be useful for:
This feature can be useful for:
- Approach monitoring – tracking the time remaining before reaching a critical location, such as a port, anchorage, or restricted area.
- Situational awareness – ensuring timely preparation for maneuvers, pilot boarding, or changes in navigation conditions.
- Safety alerts – receiving early warnings when entering designated zones, helping to prevent navigation risks.
Cautions
7
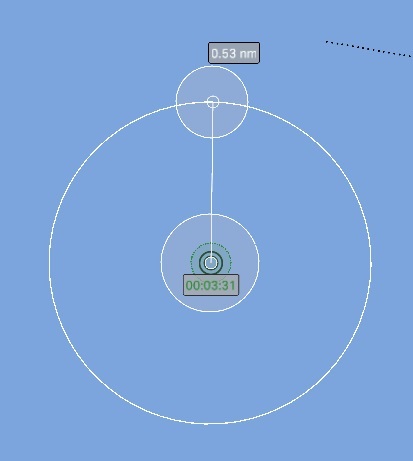
The Distance button allows you to set a central point and define a surrounding circle. ECDIS calculates the distance from the circle’s boundary to the center, displaying this value at the central point. When the vessel crosses the circle, ECDIS issues a warning.
This feature can be useful for:
This feature can be useful for:
- Proximity alerts – notifying the crew when approaching a designated area, such as a port, anchorage, or restricted zone.
- Navigational safety – ensuring awareness of critical distances to obstacles, shorelines, or navigation hazards.
- Operational planning – assisting in maneuvering decisions by providing clear distance references before reaching a waypoint or important location.
Cautions
8
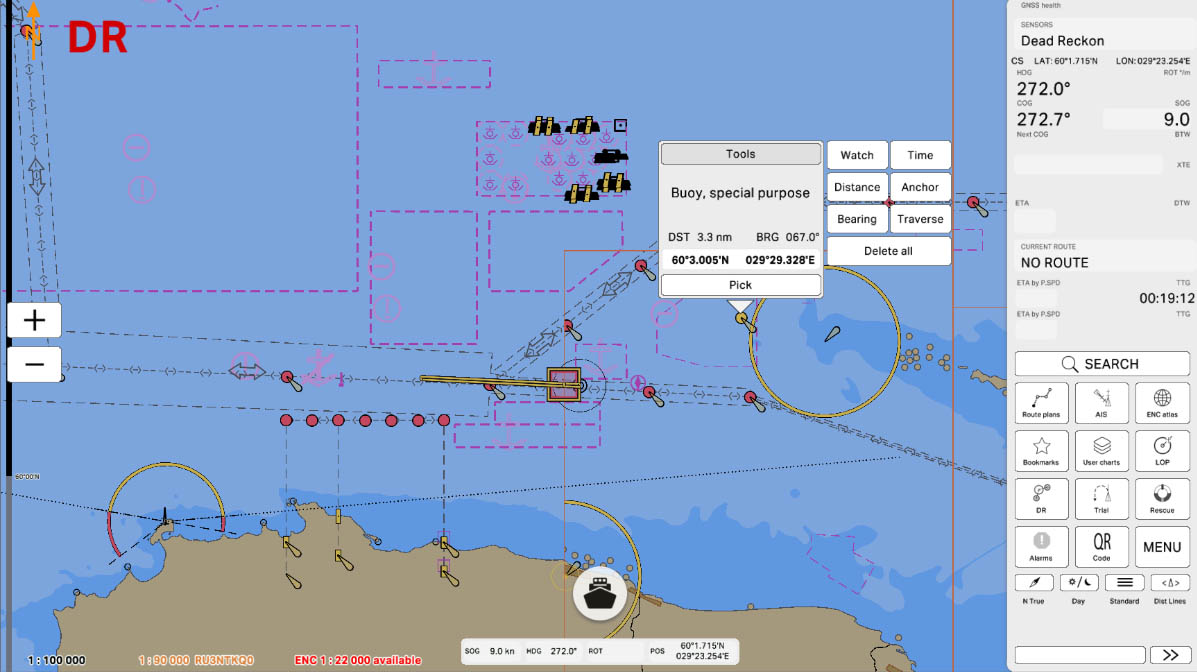
Anchor button is used to set the anchor area and activate anchor watch monitoring.
- Setting the anchor area: Press the anchor button to set the anchor area. Use the levers to change the radius and center position of the anchorage area. Tap again on the chart area to finish editing.
- Anchor Watch monitoring: Anchor watch monitoring becomes active when the vessel’s bow crosses the adjusted anchor watch radius. The anchor area is highlighted in green, and the vessel's contour is fully inside the adjusted anchorage area.
- Anchor Watch alarm: The entire ship's contour will be monitored inside the adjusted anchorage area. The anchor marker alarm will be triggered if any part of the ship's contour crosses the anchor watch radius. The anchor watch alarm will be triggered when the vessel’s bow position is outside the anchor area, and the circle will turn red when the ship leaves it.
- Canceling Anchor Watch monitoring: Tap the anchor marker and press the "Delete" button to cancel the anchor watch monitoring (or "Activate" to apply any changes for the specified anchor watch position).
Anchor
9
The Bearing button allows you to set a course. If the vessel deviates from this course, ECDIS will issue a warning.
This feature can be useful for:
This feature can be useful for:
- Maintaining navigational accuracy – ensuring the vessel stays on its intended route.
- Early deviation alerts – helping the crew take corrective action before significant course errors occur.
- Collision avoidance – assisting in maintaining a safe passage, especially in restricted or congested waters.
Cautions
10
The Traverse button allows you to set a line. If the vessel crosses this line on a perpendicular course, ECDIS will issue a warning.
This feature can be useful for:
This feature can be useful for:
- Navigational safety – alerting the crew when entering restricted or hazardous areas.
- Traffic monitoring – ensuring controlled passage through designated zones, such as separation schemes or port entry lines.
- Operational control – helping to track when the vessel crosses specific checkpoints along its route.
Cautions
11

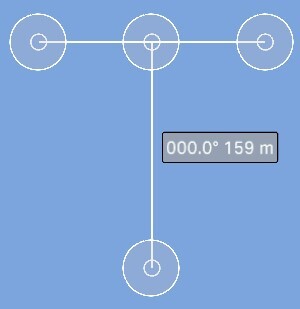
Clearing Line is used to ensure safe navigation in the presence of hazards. It is a straight line that can be adjusted in size and position.
- Setting the clearing line: Use the levers to change the size and position of the line. The clearing line helps define safe boundaries and avoid hazardous areas.
- Modifying the line: To modify the line, tap on it and press the "Activate" button. This allows you to adjust the position and size of the clearing line.
- Configuring the line: To configure the line, tap on it and press the "Configure" button. You can then make detailed adjustments to the line to suit your navigational needs.
- Deleting the line: To delete the line, tap on it and press the "Delete" button. This allows you to remove the clearing line if it is no longer needed.
Clearing Line
13
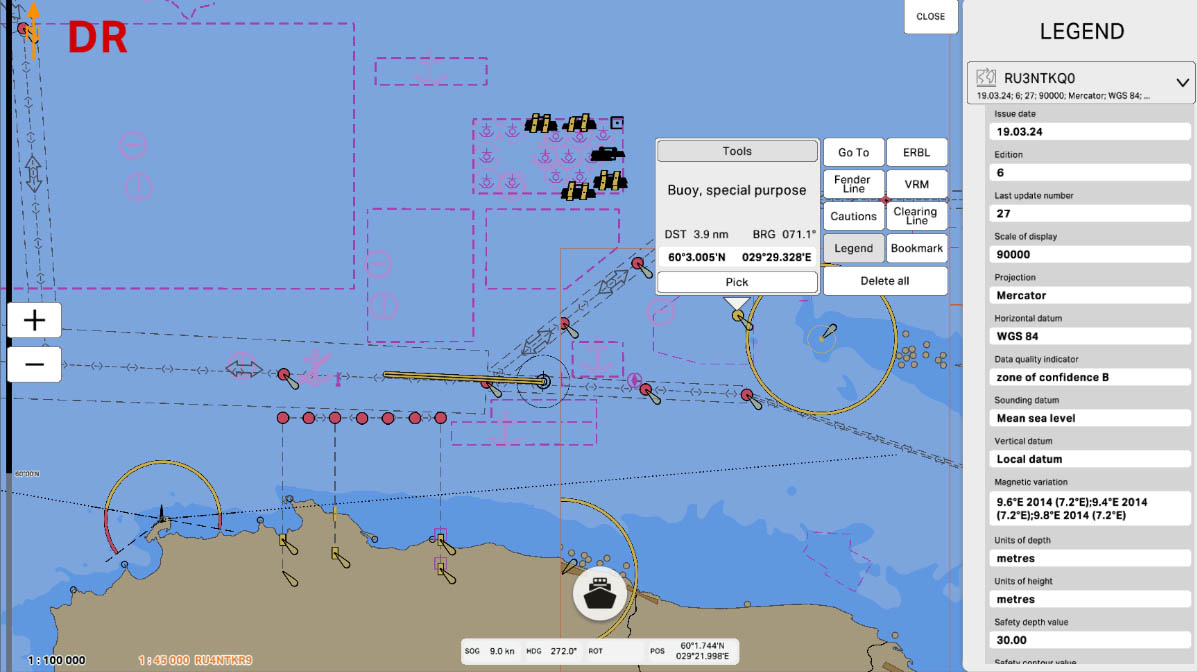
The Legend panel displays important information about the map being used. This includes key details such as the issue date, edition, last update number, scale of display, projection, and other relevant data. The issue date indicates when the map was last published or revised, while the edition refers to the version of the chart being viewed. The last update number shows the most recent update applied to the map. The scale of display provides information about the map’s level of detail in relation to the geographic area covered, and the projection describes the method used to represent the curved surface of the Earth on a flat map. This panel helps users verify the accuracy and currency of the chart, ensuring they are working with the most up-to-date and relevant information.
Legend
15
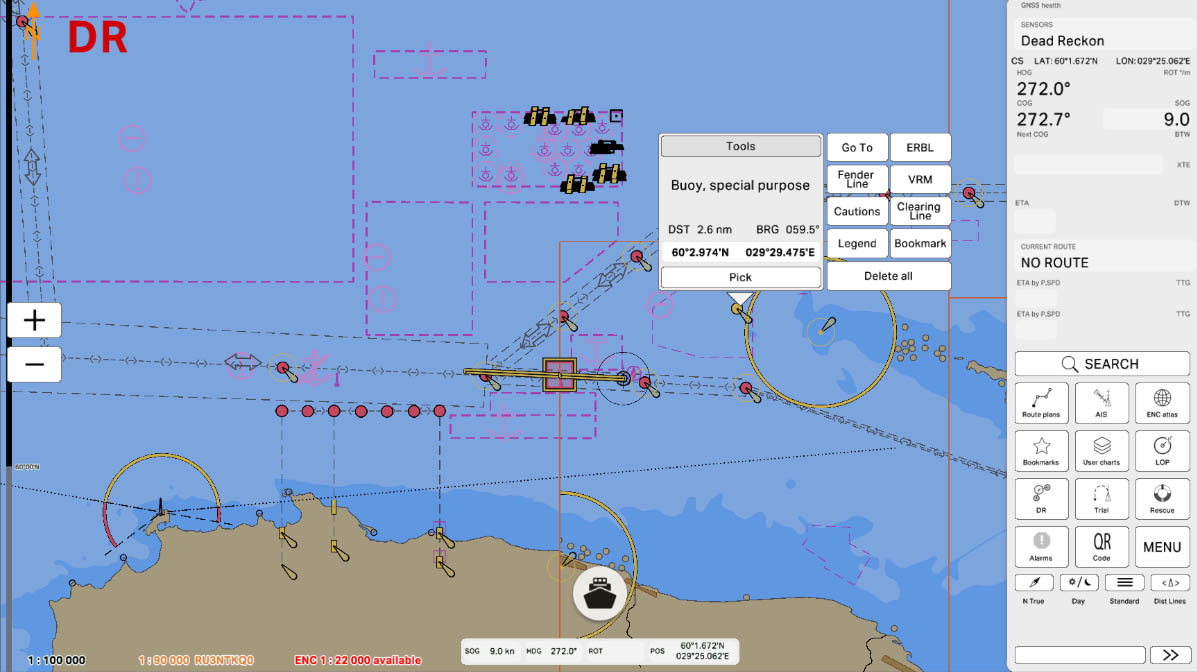
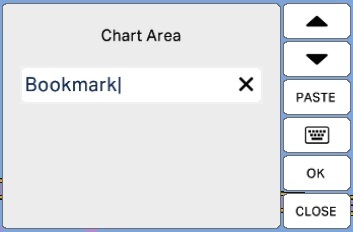
Saving bookmarks in the ECDIS system allows users to easily return to important points and areas on the navigation chart. Bookmarks can be used for quick navigation, viewing, editing, or deleting saved locations.
- Save a bookmark: Press "Tools," then press the "Bookmark" button and enter a name. The bookmark will be saved, allowing you to quickly return to this location at any time.
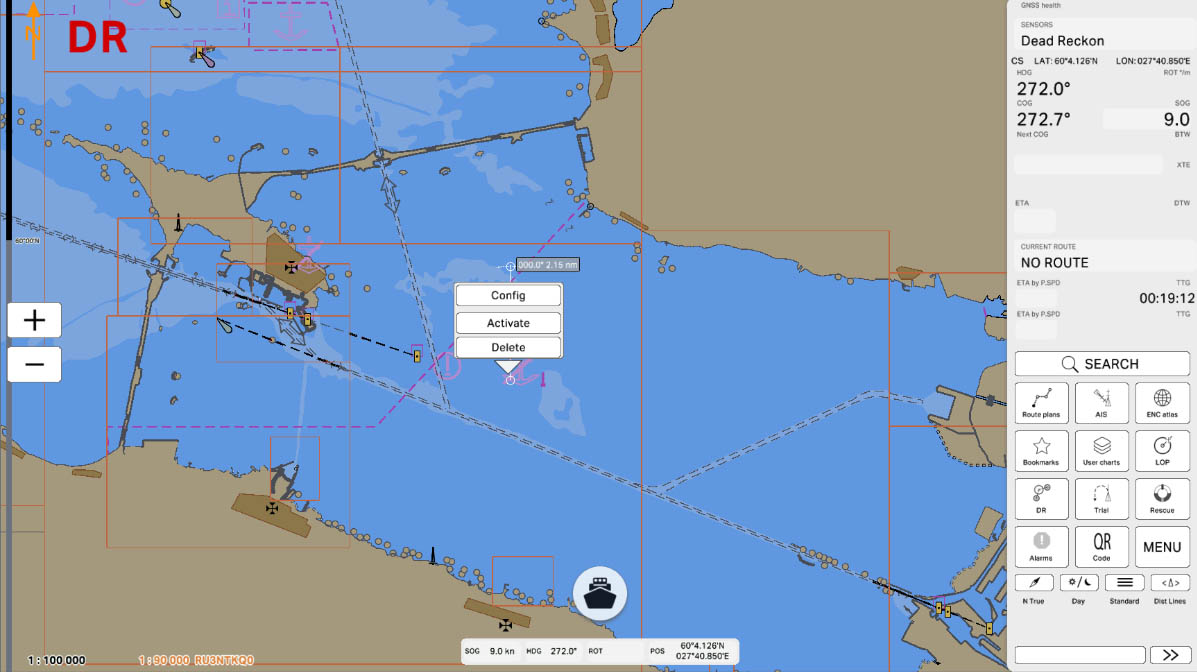
- Using, viewing, editing, and deleting bookmarks: For information on how to use, view, edit, or delete bookmarks, refer to Part 3 - Working in the "Bookmarks" section. This part provides detailed instructions on managing your bookmarks.
Bookmarks
16


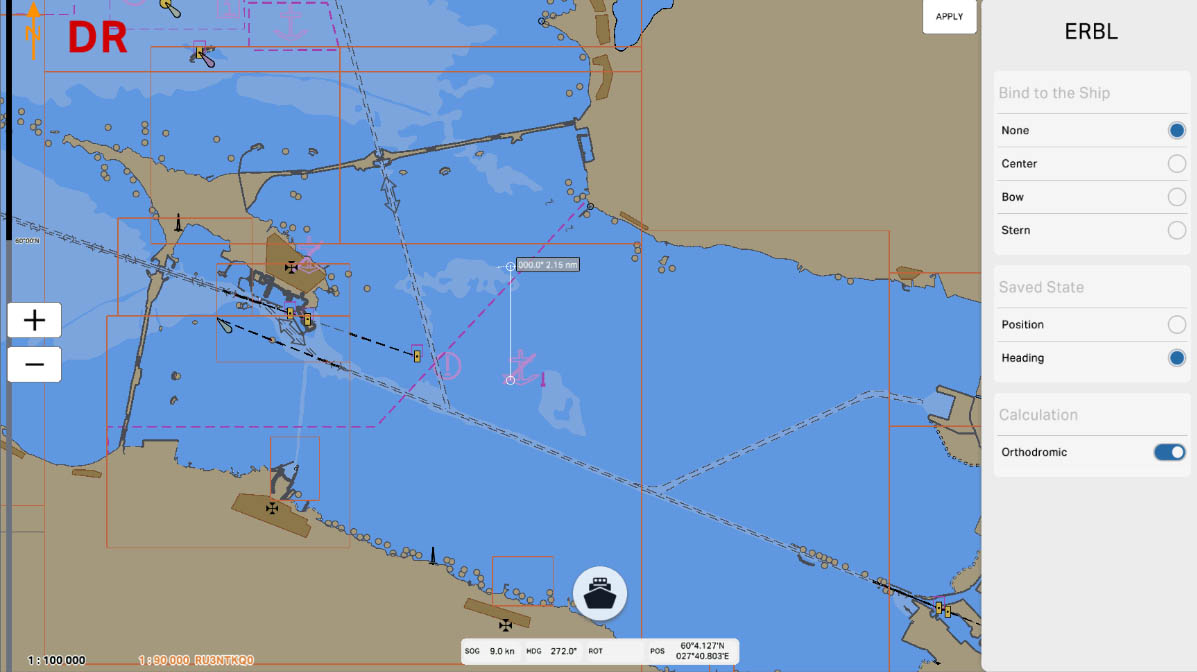
23. Position – means that tool’s destination point is binded to the fixed geographic position on ENC
24. Heading – means that tool’s destination point is not binded to the fixed geographic position on ENC and
will be movable with the ownship and adjusted bearing
25. Loxodrome/orthodrome switch.
24. Heading – means that tool’s destination point is not binded to the fixed geographic position on ENC and
will be movable with the ownship and adjusted bearing
25. Loxodrome/orthodrome switch.
Tools configuration
23
24
25
The "3.4. Navigation Tools" section has been completed.
Success!