


Part 4 - Instruments
The Route Planning panel in the ECDIS program provides users with powerful tools for creating, editing, and managing ship routes. Users can add waypoints, check their safety, adjust coordinates, and more. It's crucial to understand how to use the various functions of the panel to ensure safe and efficient navigation.
- Creating and Editing a Route
- Route Safety Check
- Route Configuration
- Reverse Route, etc.
4.1. Route Planning
>
>
4.1. Route Planning
Select 'Part 1 - Interface' to start the tutorial. After successfully completing this part, new sections and all subsequent ones will be accessible in this menu.
The currently examined element is indicated by a green outline and numbering. Explanations will be provided in this window. After reviewing the information, click the 'Next' button or follow the instructions. If you wish to go back to the previous step, click 'Back'. If you decide to finish the study prematurely or choose another section, click 'End'.
Message
0
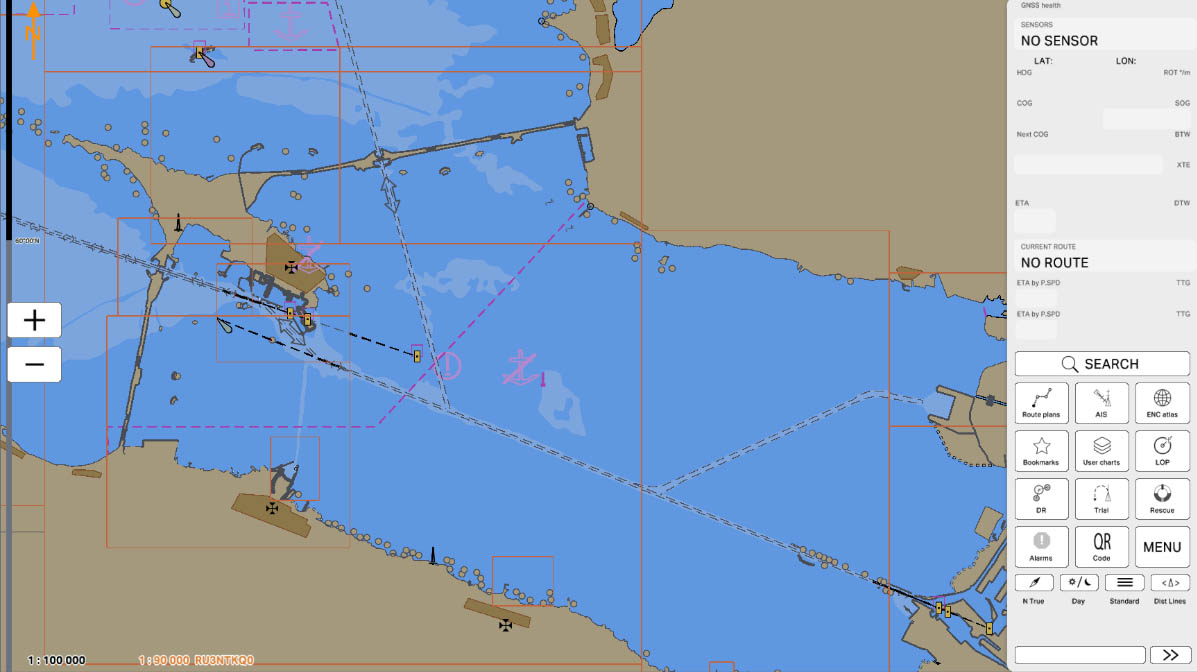

The Routes Panel displays all your routes. Currently, there are no routes. You can either import a route or create one directly in the program. We will look at how to create a route in the program.Routes in ECDIS help you plan and track your vessel's journey. You can add, edit, and delete routes, and save them for future use. Each route consists of a series of waypoints that can be customized according to your needs.
To continue and create a new route, click the "new" button on the Routes panel.
To continue and create a new route, click the "new" button on the Routes panel.
Routes Panel
2
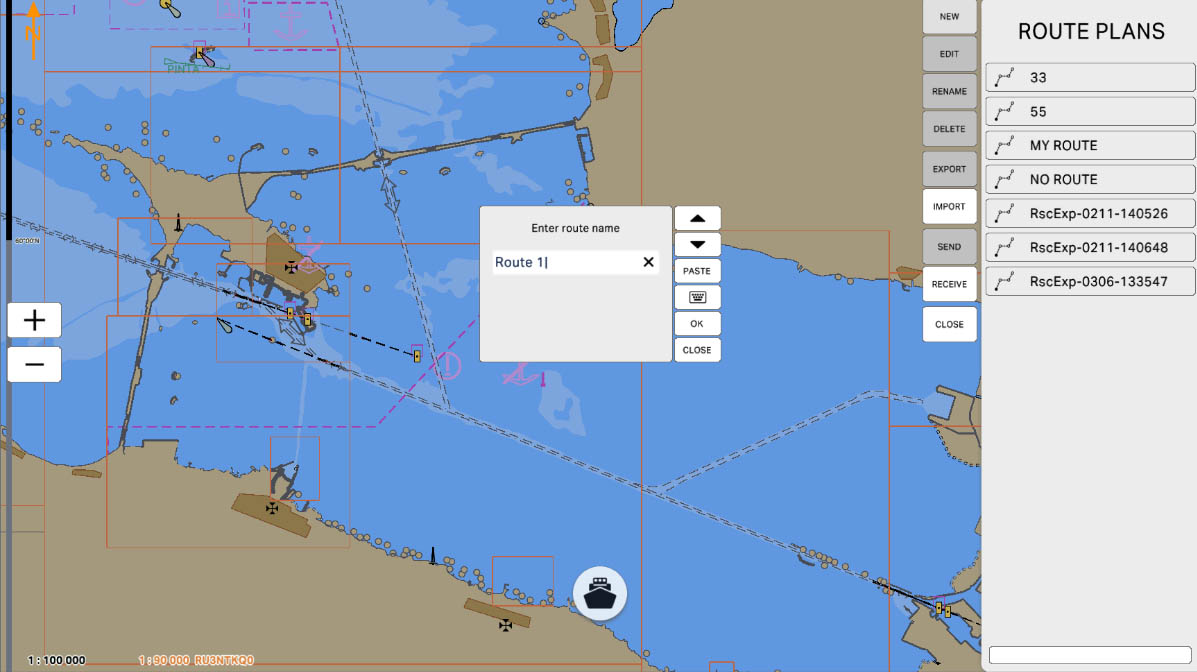
In the appearing window, you need to specify the desired name for the new route. You can enter the name using the regular keyboard or the on-screen keyboard. To bring up the on-screen keyboard, click the button with the keyboard icon.When choosing a name for the route, it's recommended to use a clear and descriptive name that will help you easily identify the route in the future. For example, you can use the destination name or other important route details.
To continue, click "next".
To continue, click "next".
Creating a New Route
3

To confirm the entered route name, click "OK". You can always change the name later if needed.
Remember that proper naming of routes helps in navigation and route management, especially if you have many different routes. Make sure the name is clear and easily identifiable.
To continue, click the "OK" button.
Remember that proper naming of routes helps in navigation and route management, especially if you have many different routes. Make sure the name is clear and easily identifiable.
To continue, click the "OK" button.
Confirming the Route Name
4
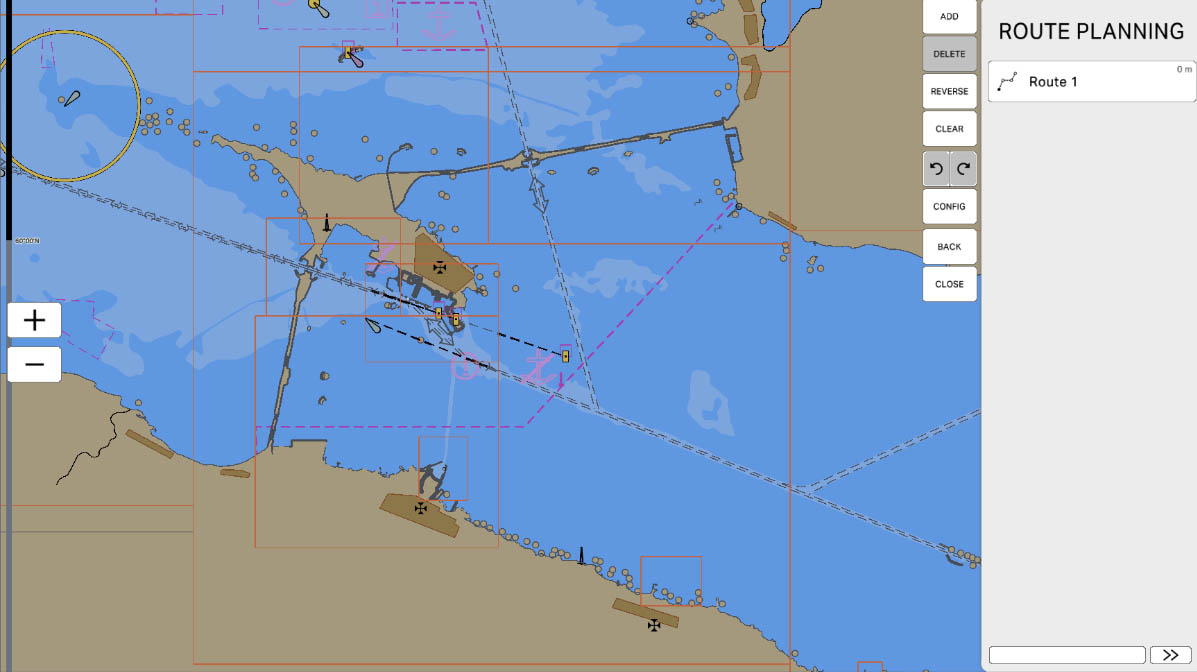
After creating a new route, you are taken to the Route Planning panel. Here you can create and edit waypoints.The Route Planning panel allows you to add waypoints, edit their positions, and set parameters such as course. This is an important step in navigation, as precise route planning helps avoid hazardous areas and ensures a safe journey.If you click on the created route tab, you will see more detailed information about it.
To continue, click on the "Route 1" tab.
To continue, click on the "Route 1" tab.
Route Planning
5
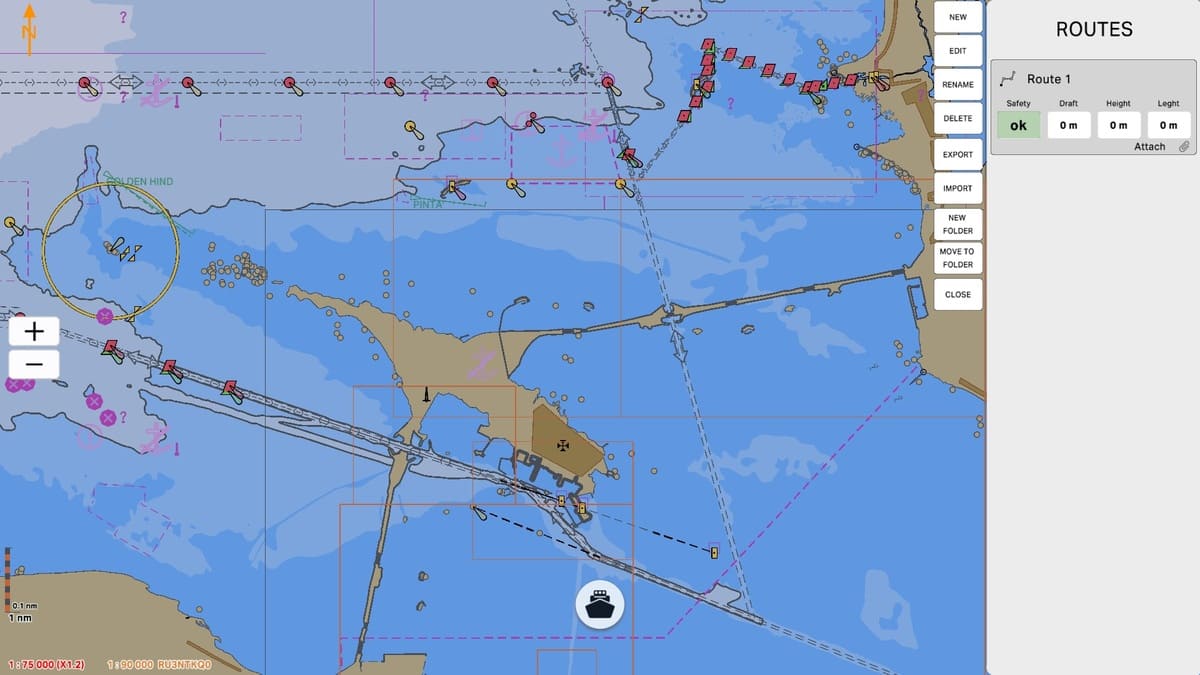
Now the created route tab is active, and you can see more detailed information, which consists of the following parameters:
Safety: Indicates whether the route is safe.
Draft: The vessel's draft.
Height: The vessel's height.
Length: The vessel's length.
There is also an option to view a file with the route description, which needs to be prepared in advance.Currently, the route has no waypoints.
To continue and set the waypoints, click "Edit" on the Routes panel.
Detailed Route Information
6

To set a waypoint, you can click the "Add" button, which will create the point at the current location. Alternatively, you can create a waypoint by clicking directly on the map at the desired location. You can always adjust the coordinates of the waypoint for more precise positioning.When creating waypoints, it's important to consider depth and other conditions to ensure safe navigation. You can edit each waypoint to optimize the route.
To continue, click "Next".
To continue, click "Next".
Adding a Waypoint
7
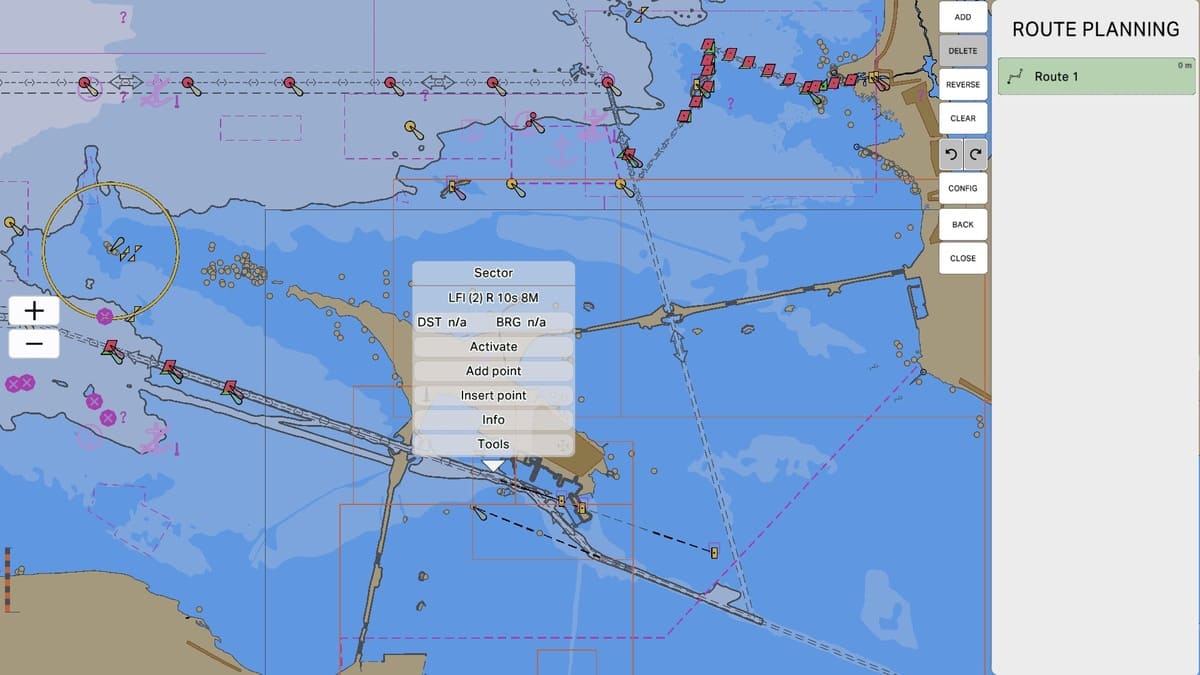
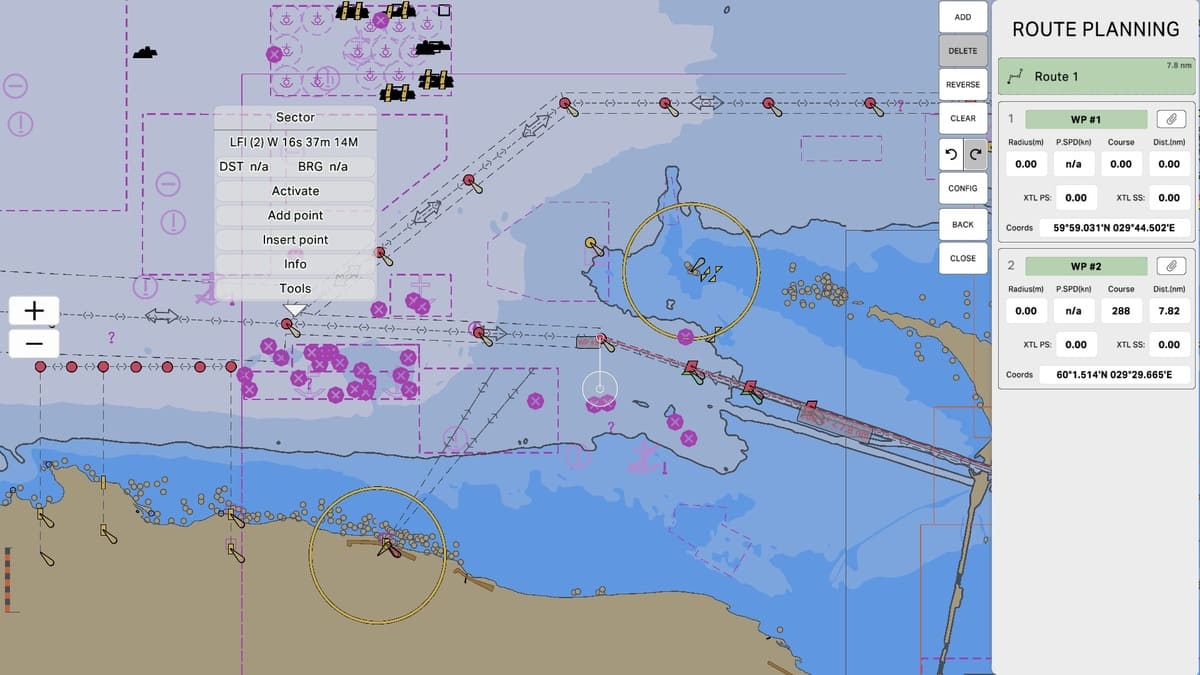
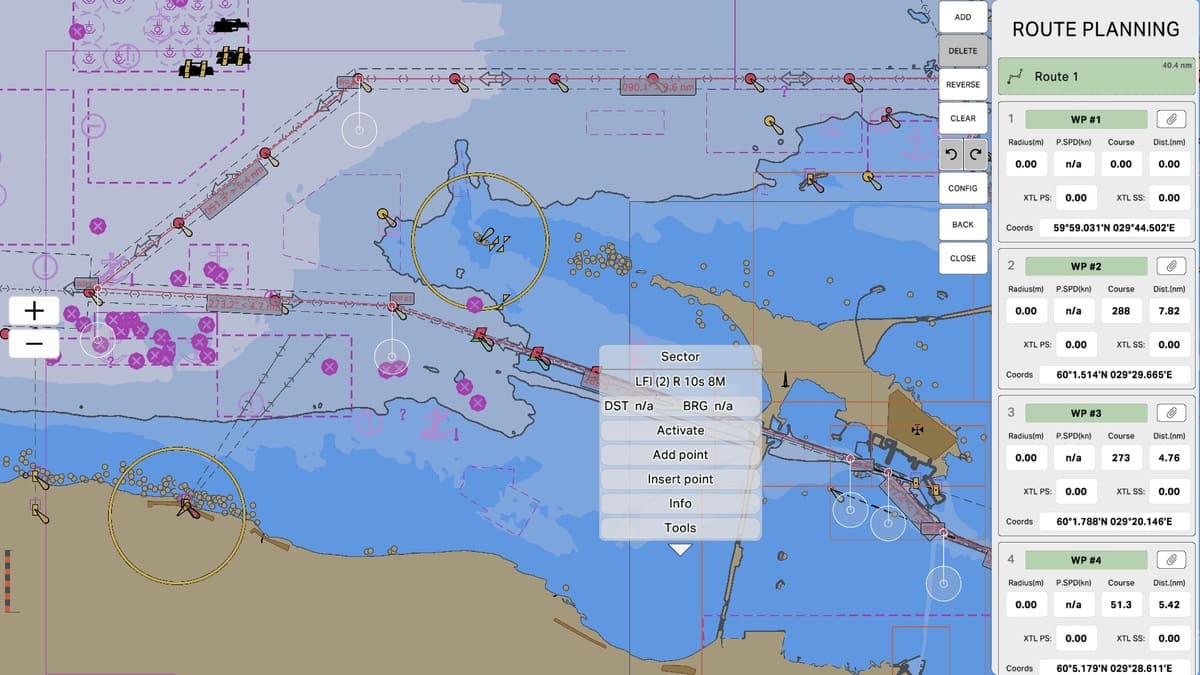
By clicking on a section of the map, an information window will appear where you need to click "Add point". This action will create a new waypoint at the selected location.Adding waypoints on the map allows you to precisely control the route, ensuring it passes through safe and convenient areas. You can always move or delete waypoints later if you need to adjust the route.
To continue, click "Add point".
To continue, click "Add point".
Adding a Waypoint on the Map
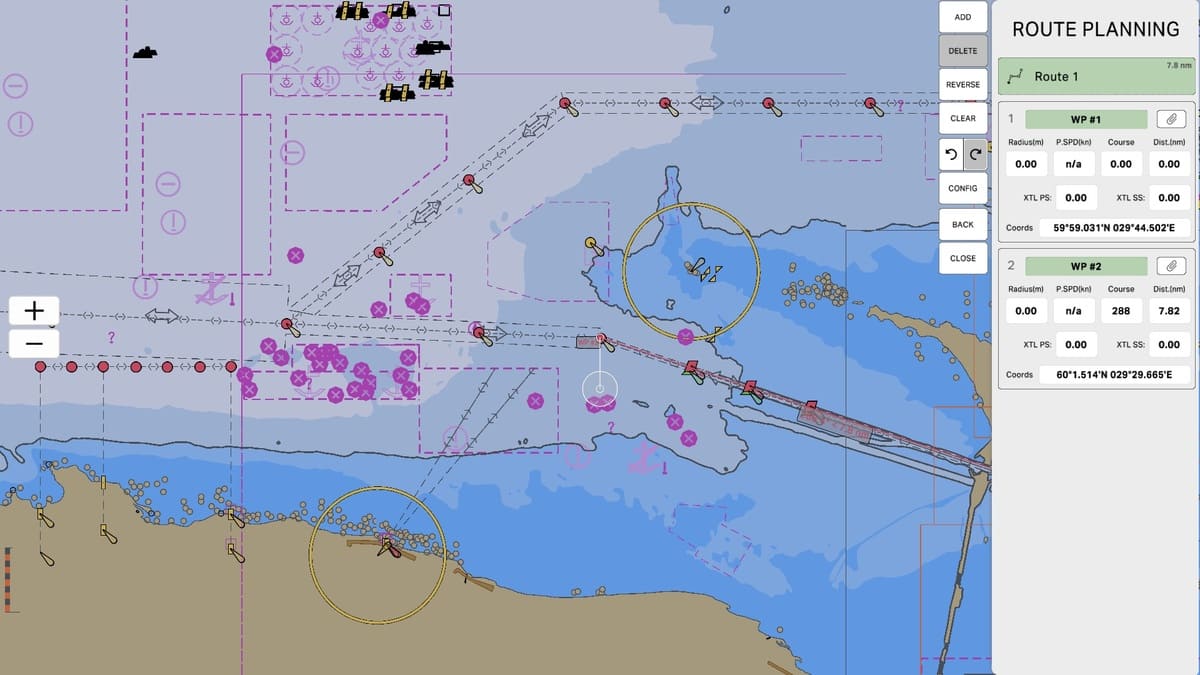
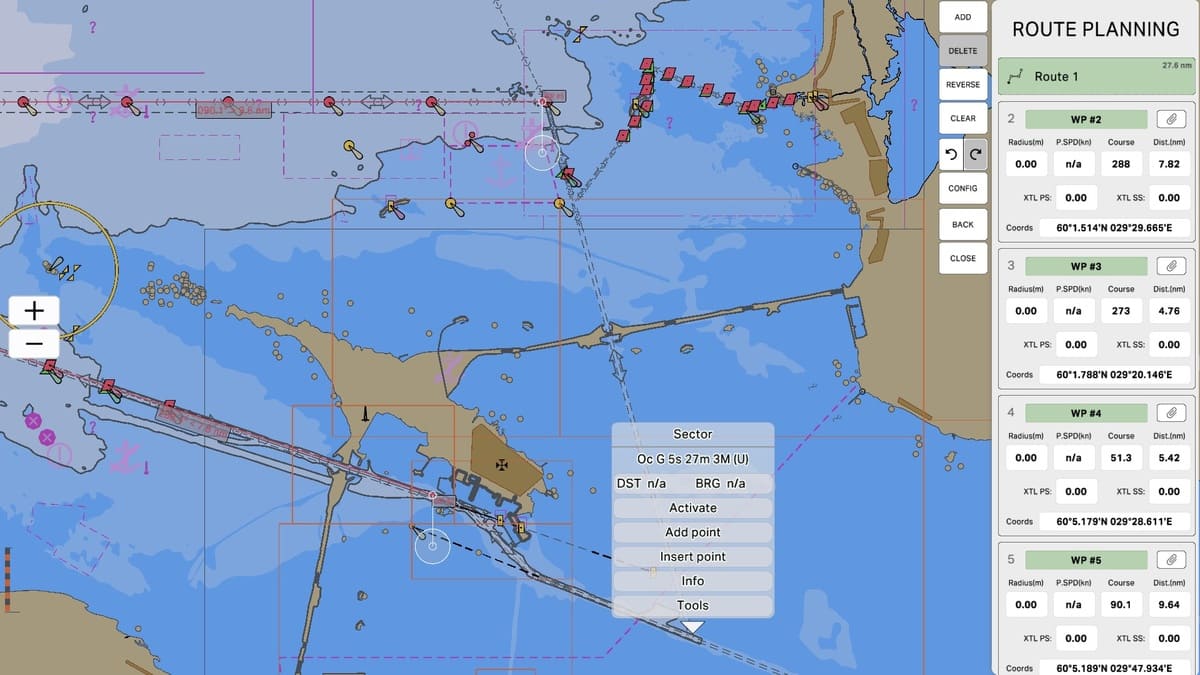
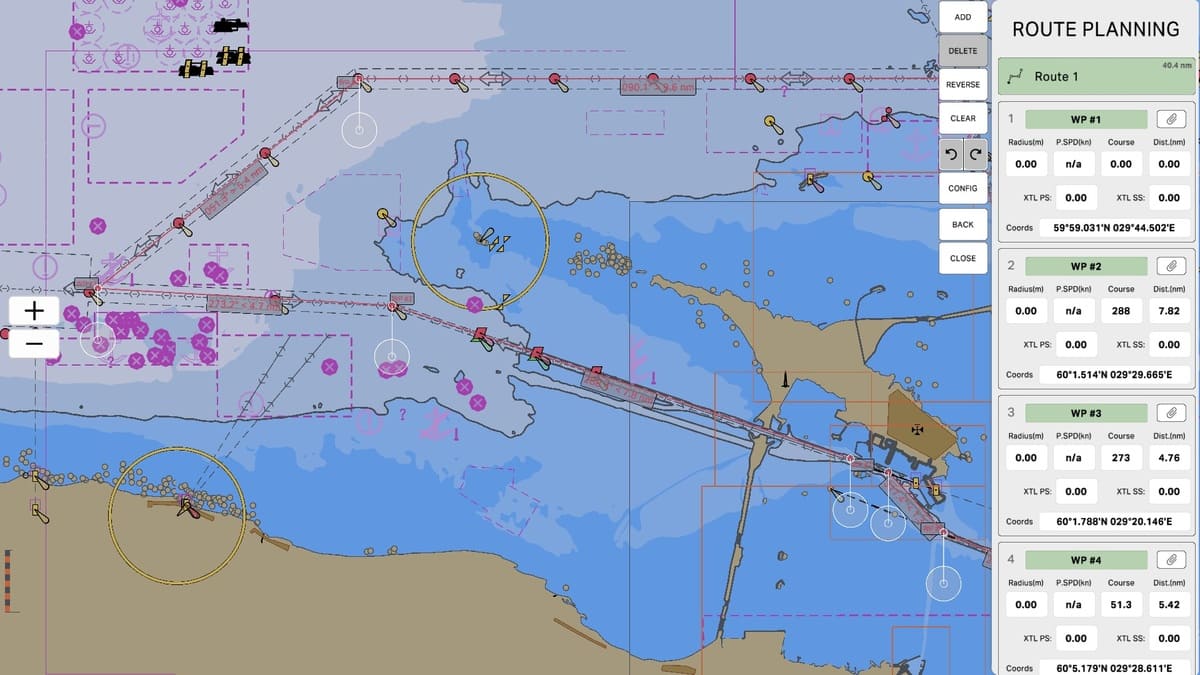
8
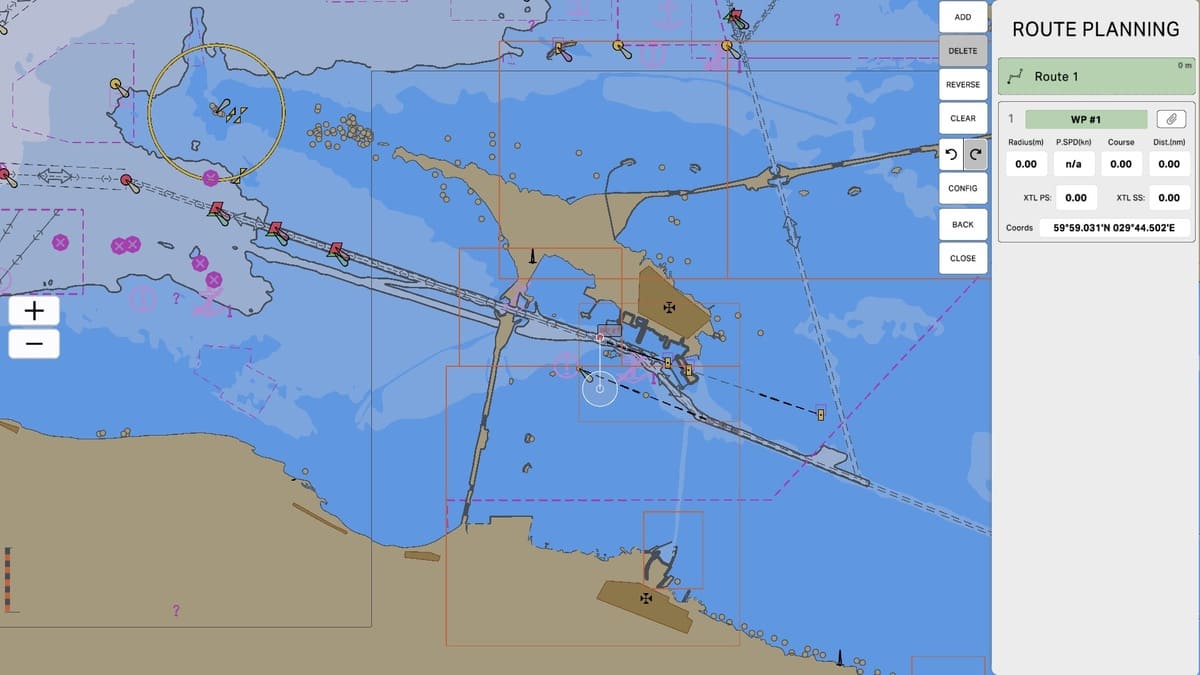
You have created the first waypoint. The information about the waypoint consists of the following parameters:
These parameters will help you carefully plan and optimize your route, taking all important details into account for safe navigation.
To continue, click "Next".
- Sequential Number: A unique identifier for the waypoint in the route.
- Waypoint Name: Displayed based on safety calculations, highlighted in green (safe) or red (warning of potential danger).
- "Attach" Button: Allows you to view a pre-prepared file with the description of the waypoint.
- Radius (m): The radius around the waypoint in meters.
- P.SPD (kn): Predicted speed of the vessel in knots.
- Course: The vessel's course relative to north.
- Dist. (nm): Distance from the current position to the waypoint in nautical miles.
- XTL. PS: Parameters related to the transverse point of the route.
- XTL. SS: Parameters related to the transverse speed of the route.
- Coords: Coordinates of the waypoint (latitude and longitude).
These parameters will help you carefully plan and optimize your route, taking all important details into account for safe navigation.
To continue, click "Next".
Route Point Information
9
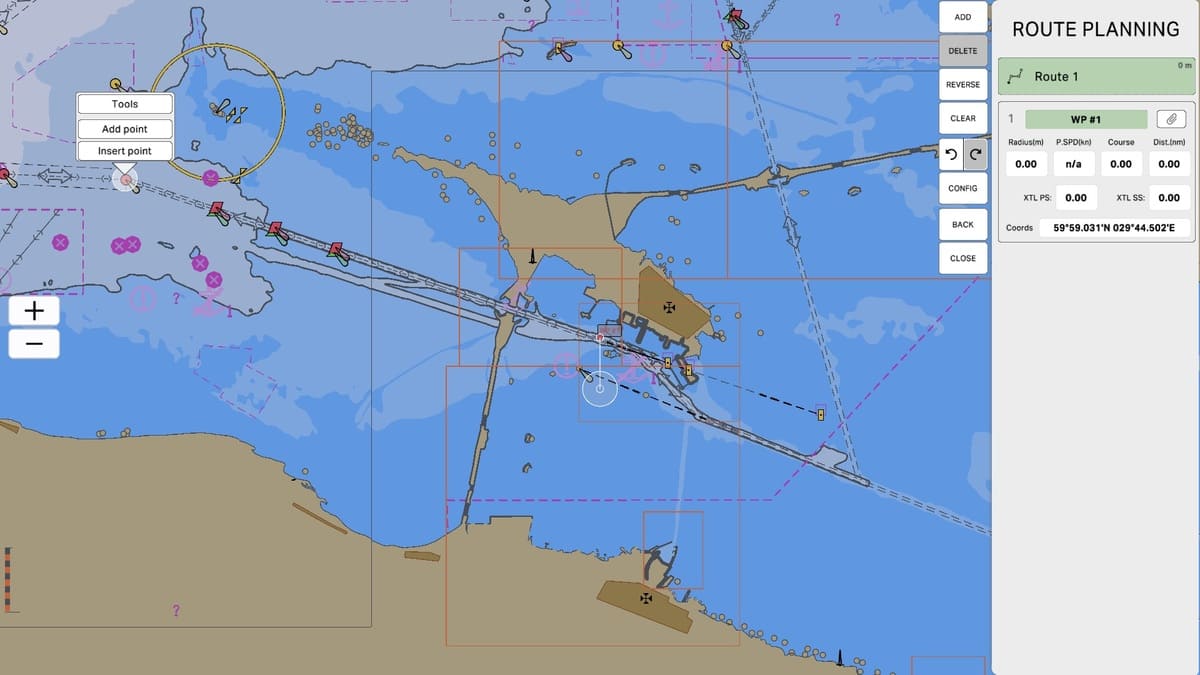
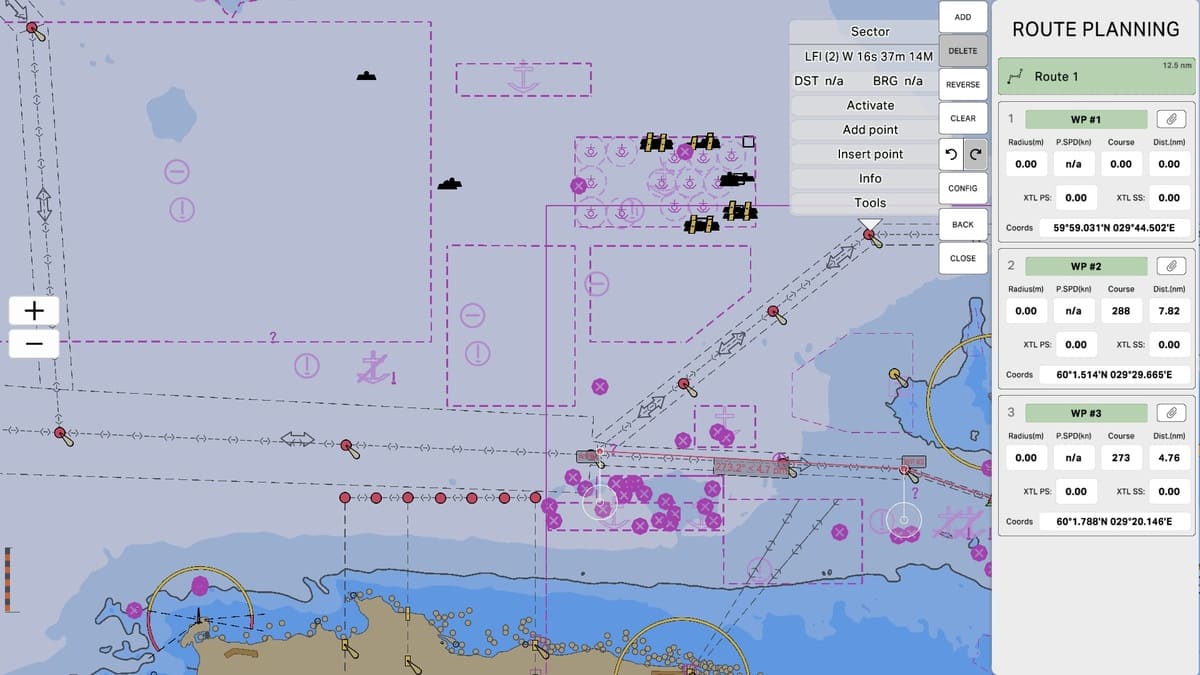
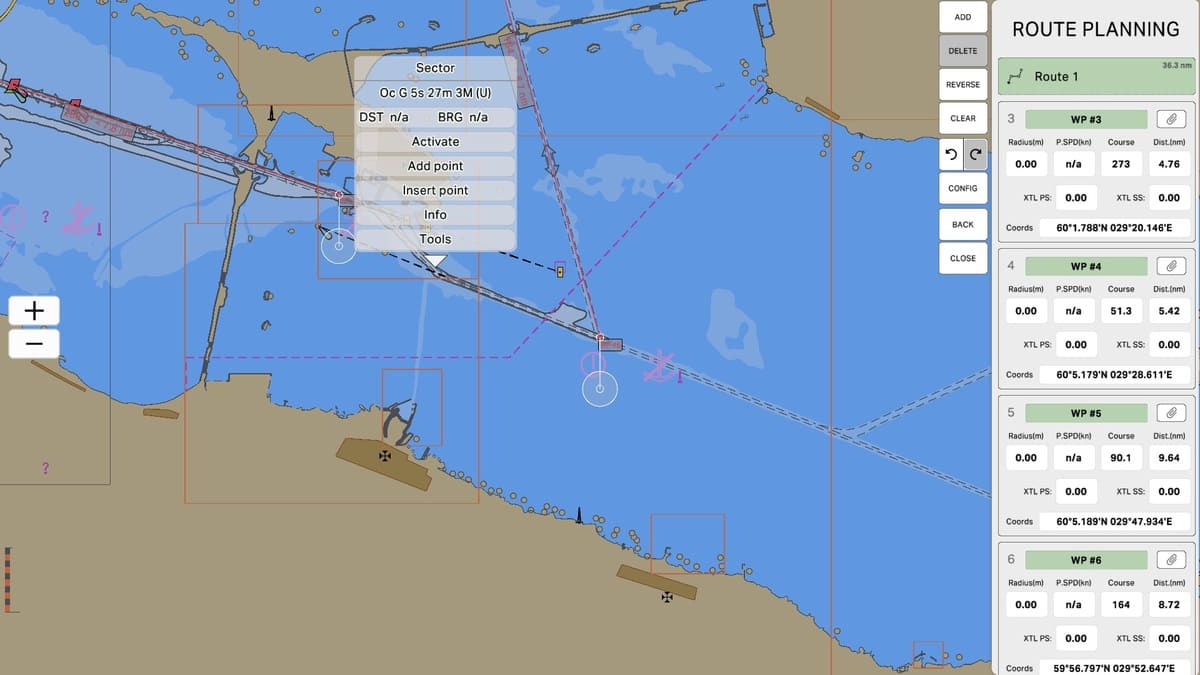
To create the second waypoint, follow these steps: Click on the section of the map where you want to place the next waypoint. In the appearing information window, click the "Add point" button. This action will create the second waypoint at the selected location.
Creating multiple waypoints allows you to more precisely define the route and guide it through key areas, ensuring safe and efficient navigation.
To continue, click "Add point".
Creating multiple waypoints allows you to more precisely define the route and guide it through key areas, ensuring safe and efficient navigation.
To continue, click "Add point".
Creating the Second Waypoint
10
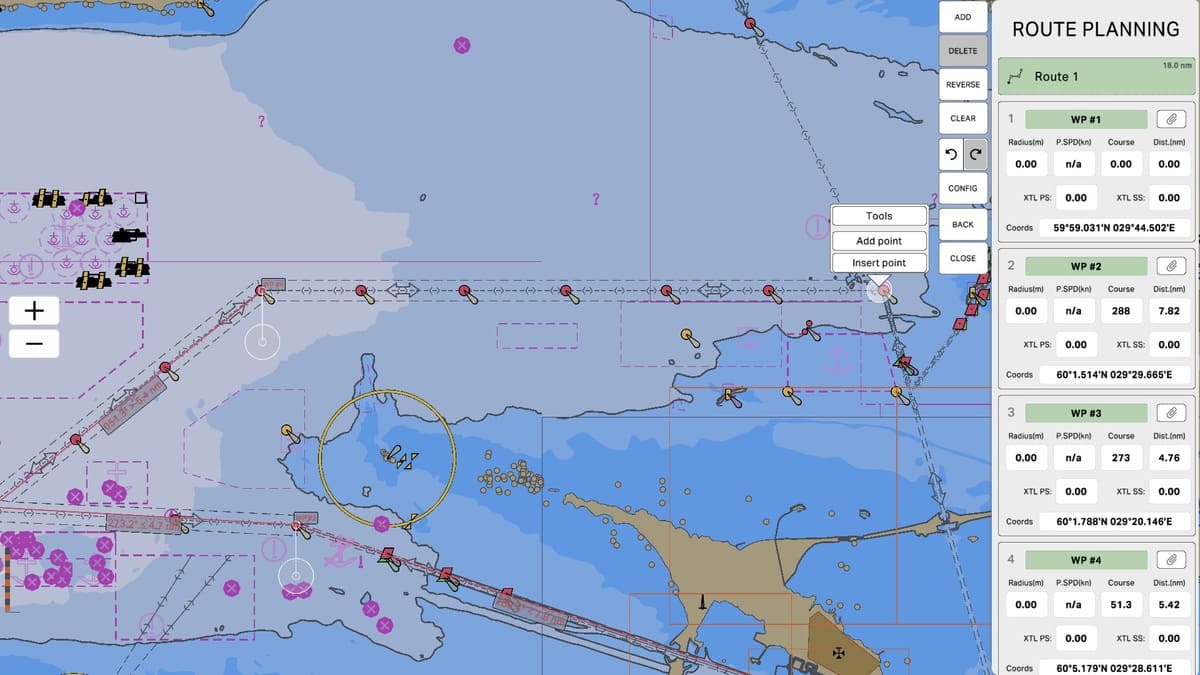
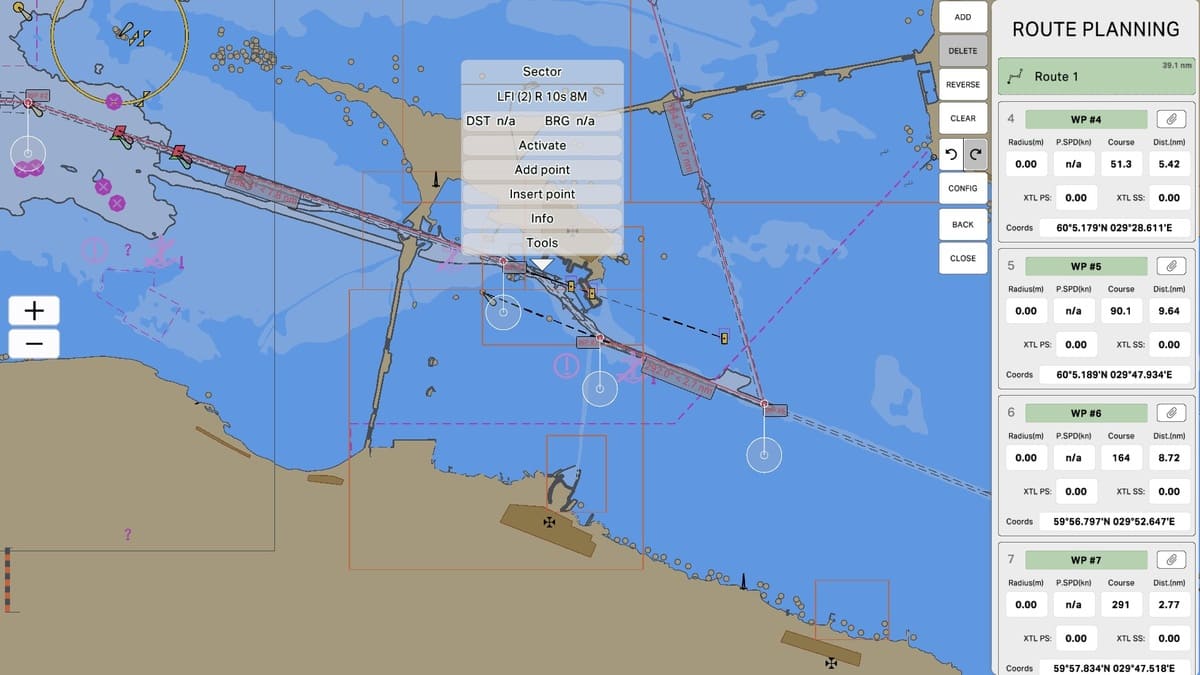

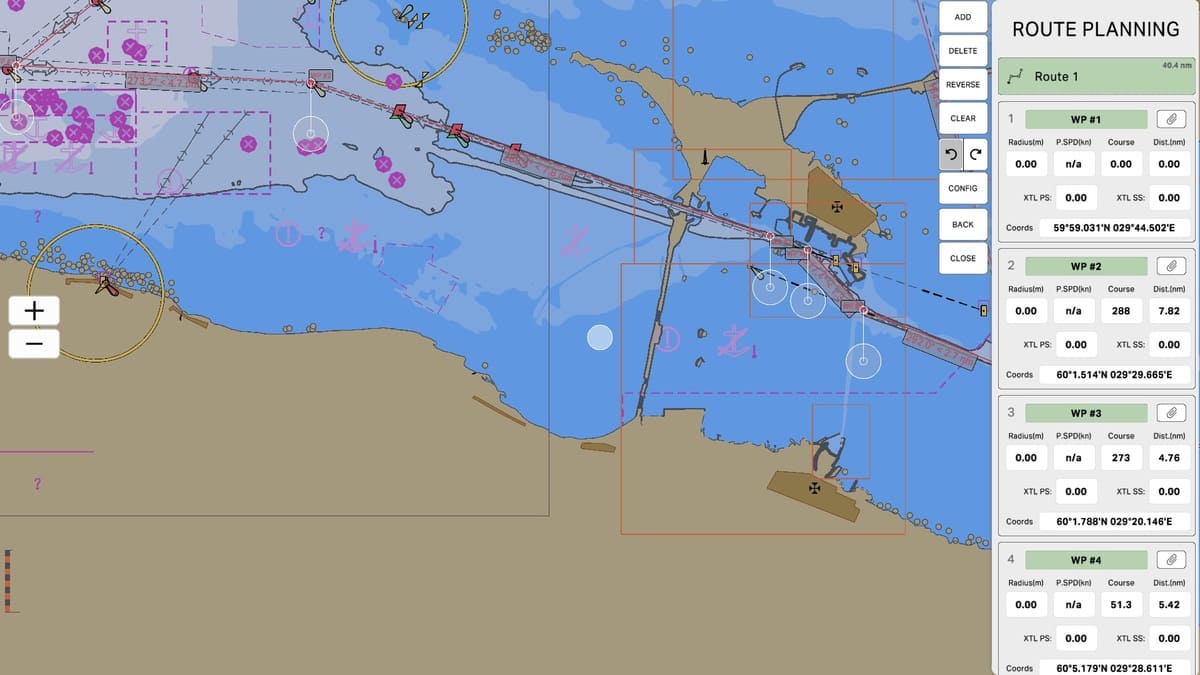
We have created all the waypoints for the route. The route name and the names of all the waypoints are highlighted in green, indicating that the route is safe for the vessel based on the given parameters.If you need to specify more precise coordinates for a waypoint: Click on the coordinates field. Enter the coordinates using the keyboard for more accurate positioning.
This will allow you to ensure maximum route accuracy and account for all necessary details for safe navigation.
To continue, click "Next".
This will allow you to ensure maximum route accuracy and account for all necessary details for safe navigation.
To continue, click "Next".
Completing the Route Creation
11

It is useful to have a reverse version of the created route, which can be done with just one click. This can be useful, for example, for returning to the starting point or for checking the route for potential errors.To create a reverse route, follow these steps: Click the "Reverse" button on the Route Planning panel. This button will automatically create the reverse version of the route by reversing the order of the waypoints.
This simplifies planning the return journey and allows for easy checking of the route for errors and inconsistencies.
To continue, click the "Reverse" button on the Route Planning panel.
This simplifies planning the return journey and allows for easy checking of the route for errors and inconsistencies.
To continue, click the "Reverse" button on the Route Planning panel.
Creating a Reverse Route
12

The reverse route has been successfully created. Note that the word "reverse" has been appended to your route name, indicating that this is the reverse version of your original route. This helps in easily identifying it among other routes.
To return to the previous screen and continue working with the route, click the "Back" button on the Route Planning panel.
To return to the previous screen and continue working with the route, click the "Back" button on the Route Planning panel.
Reverse Route Created
13
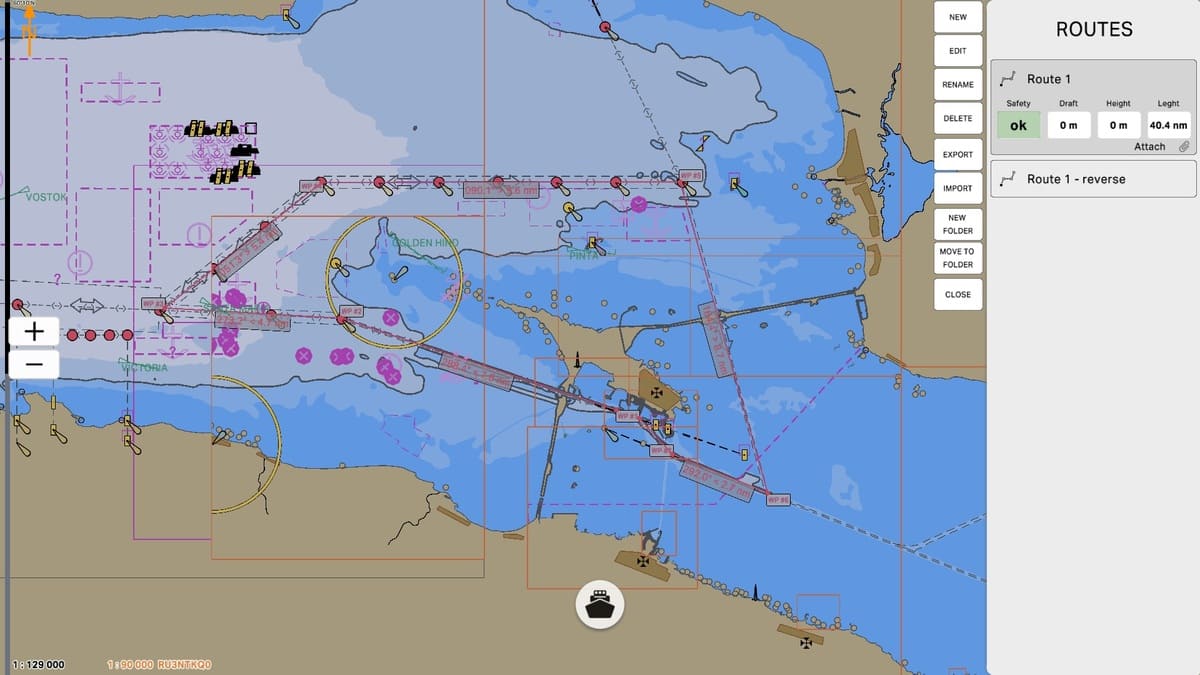
Now, the routes panel shows two routes: the one we created and its reverse version. We will now look at how to edit a route.Your route is already active, indicated by the dark gray color of its tab and the visible additional information. This means you can immediately proceed to edit it.
To continue and make changes to the route, click the "Edit" button on the Routes panel.
To continue and make changes to the route, click the "Edit" button on the Routes panel.
Editing the Route
14

Now we will look at a situation where a waypoint is selected in a way that poses a hazard to the route. This is crucial to ensure the safety of the vessel and to avoid accidents.In the case of a hazardous waypoint, its name will be highlighted in red, indicating a potential danger. It is necessary to review and adjust the coordinates of such a waypoint to make the route safe.
Click "Next" to continue.
Click "Next" to continue.
Hazardous Waypoint
15
Click on a section of the map to bring up the information window. In this window, you can add a waypoint by clicking the "Add Point" button. In this example, we will intentionally select a point that poses a hazard to the route to demonstrate how the program displays this and how to correct it.
Click "Add point" to continue.
Click "Add point" to continue.
Adding a Waypoint
16

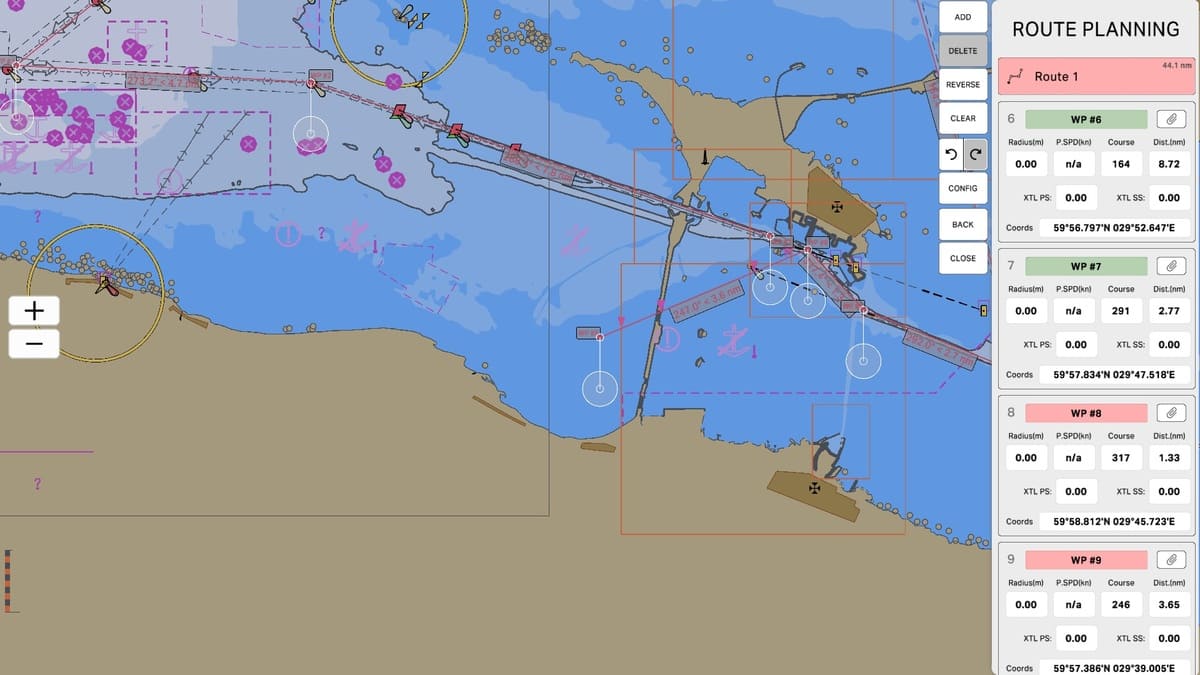
A hazardous waypoint has been created. Notice that the route name field is highlighted in red, indicating a dangerous section on the route. Points 8 and 9 are also highlighted in red, signifying that the hazardous section lies between these points.On the map, you can see an obstacle, such as a dam, between points 8 and 9. These visual indicators help users quickly identify and correct potential risks on the route.If you accidentally created a hazardous waypoint, you can undo the last action by clicking the "Undo" button (marked with an appropriate arrow). This feature allows for quick and easy adjustments without having to start over.
Click "Undo" to continue.
Click "Undo" to continue.
Creating a Hazardous Waypoint
17
The situation is corrected, and now you can continue building the route. Correcting hazardous waypoints is a crucial part of planning a safe path for the vessel. The ECDIS system provides users with tools to quickly and accurately identify and eliminate such hazards.Next, we will look at another situation where undoing the last action won't work. This will help you understand how to act in more complex situations that require additional steps to correct errors.
Click "Next" to continue.
Click "Next" to continue.
Route Planning
18
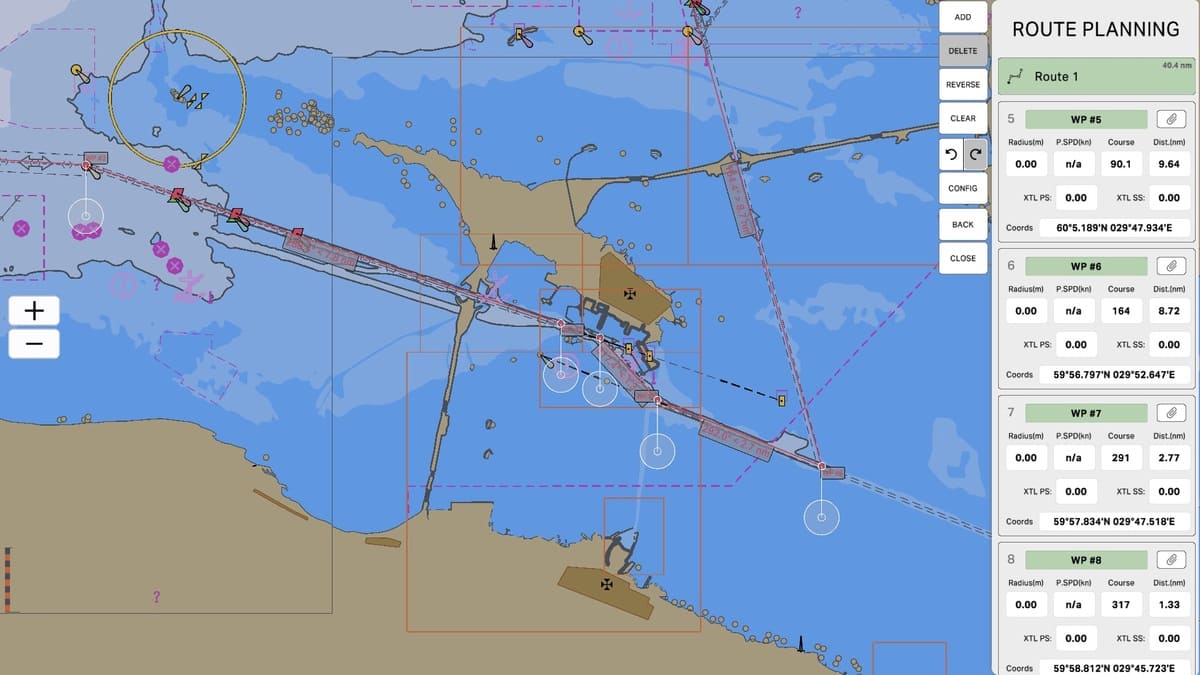
There may be a situation where the route is already created, and hazards appear on the route for various reasons. For example, after updating the charts, new hazards may appear on the route. In such cases, you should correct the route by removing the hazardous waypoint and replacing it with a safe one. This ensures the safety of the vessel and avoids potential risks.
To continue, click on the tab for waypoint 9 to make it active.
To continue, click on the tab for waypoint 9 to make it active.
Route Planning
19

The waypoint 9 tab is active, indicated by its dark gray color. Now we can perform actions with this tab, specifically, we will delete it by clicking the "Delete" button on the Route Planning panel. Deleting the hazardous waypoint allows us to make adjustments to the route and ensure its safety.
To continue, click the "Delete" button on the Route Planning panel.
To continue, click the "Delete" button on the Route Planning panel.
Route Planning
20
The hazardous waypoint has been deleted, and now it can be replaced with a new, safe one. Next, we will explore the Config section for Route Planning. In the Config section, you can adjust route parameters, such as permissible limits, vessel type, and other critical settings.
To continue, click the "Config" button on the Route Planning panel.
To continue, click the "Config" button on the Route Planning panel.
Hazardous Waypoint Deleted
21


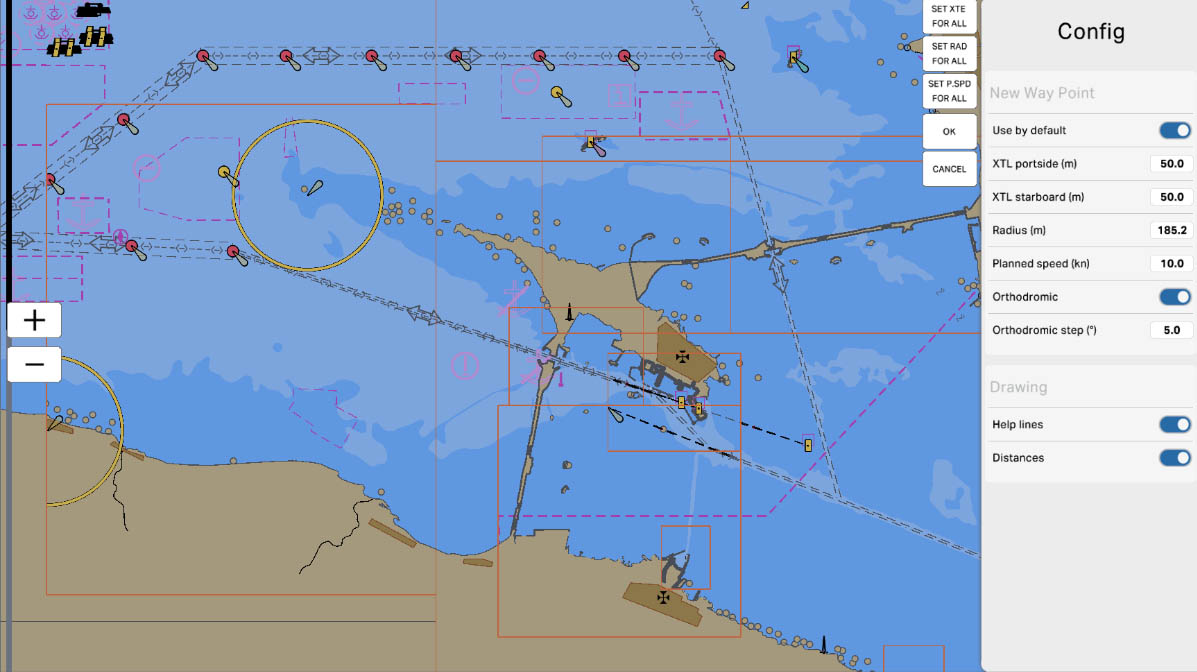
This parameter sets the value for the side deviation from the center of the vessel to the port side in meters. It is crucial for determining the safe distance at which the waypoint should be from the left side of the vessel to avoid collisions or hazardous situations.
XTL Portside (m)
24

Similar to the XTL Portside parameter, this parameter sets the value for the side deviation from the center of the vessel to the starboard side in meters. It helps define a safe distance for the right side of the vessel to ensure safe passage through potential hazard areas.
XTL Starboard (m)
25

This parameter establishes the safety radius around the waypoint in meters. It defines the area around the waypoint within which special caution should be observed. This radius helps account for potential positioning inaccuracies and provides an additional layer of safety.
Radius (m)
26


This setting allows you to enable or disable the display of helper lines on the map. Helper lines assist in visually aligning and refining the route points and their placement. They may include lines connecting waypoints or lines displayed during route planning and editing. Enabling this option enhances route visibility and makes route editing more intuitive.
Help Lines
31

This setting allows you to display distances between route points or between the vessel's current position and the nearest waypoint. Distances can be shown in various units of measurement, such as nautical miles (NM) or kilometers (km). This feature helps users gauge the distance to upcoming waypoints or to points of interest on the map, facilitating route planning and adjustments.
Distances
32

To exit the 'Config' section and save the changes you have made, click the 'OK' button. This button confirms and applies all changes to the route. If you wish to exit the 'Config' section without saving changes, click the 'CANCEL' button. This action discards all changes, and they will not be applied.
To proceed, click the 'OK' button to save your changes.
To proceed, click the 'OK' button to save your changes.
Exiting the "Config" Section
33
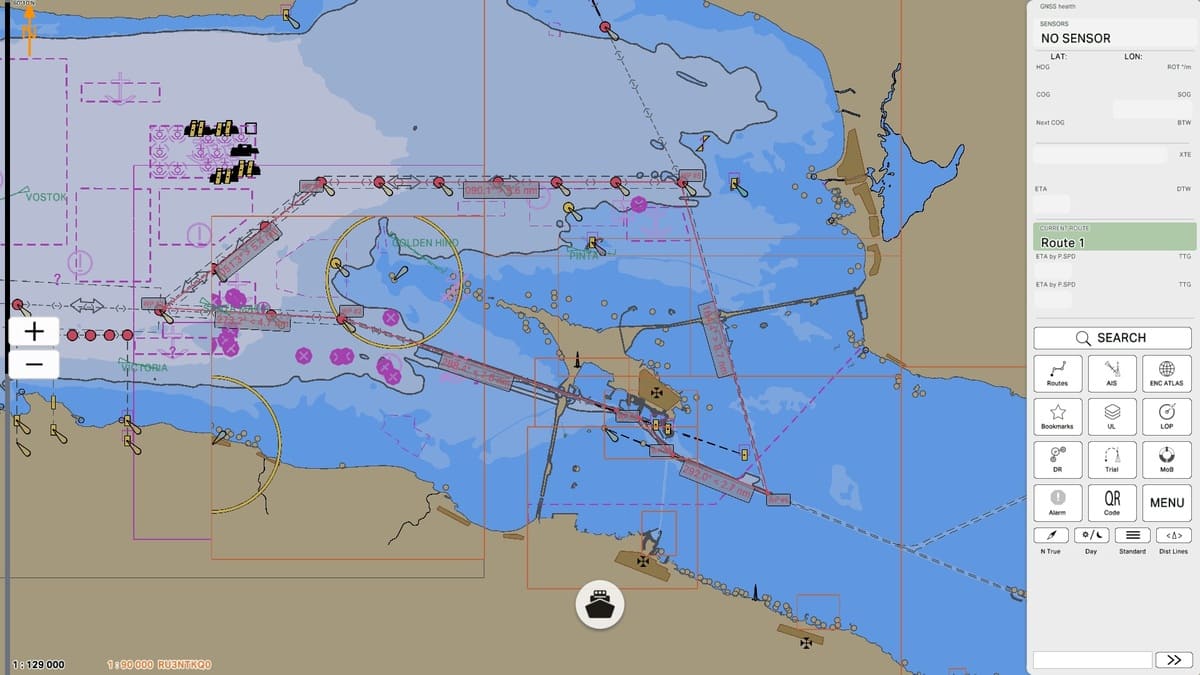
On the main panel, the Current Route section displays the name of the selected route along with the safety status color: green for safe, red for unsafe. This allows for a quick assessment of the route's status and the necessary adjustments if required. If the route is unsafe, you should enter the route editor and make corrections. You can click on the Current Route tab for a quick transition to the route editor.
Click on the Current Route tab to continue.
Click on the Current Route tab to continue.
Displaying the Current Route
34
Creating and managing routes is an essential part of using the ECDIS program. You have learned how to create new routes, add and edit waypoints, check their safety, and organize routes into folders for convenience. You have also mastered the function of creating a reverse route and learned how to use various configuration settings for more precise route planning.With this foundational knowledge of route management, you are now ready to move forward and explore other features of the ECDIS program.
To proceed, click on "Next".
To proceed, click on "Next".
Routes Panel
35
The "4.1. Route Planning" section has been completed.
Success!